![spl-siana-imagotype-color.svg]](https://help.spalopia.app/hubfs/spl-siana-imagotype-color.svg)
🔍 How it works: If you have online sales enabled through the Booking Engine, all bookings made by customers on your website will automatically appear in the Agenda.
✉️ If you do not have the Booking Engine module contracted and would like to learn about its benefits, write to soporte@spalopia.com to book a free demo session.
If the customer comes directly to reception or calls by phone, you can add the booking manually by following these steps:
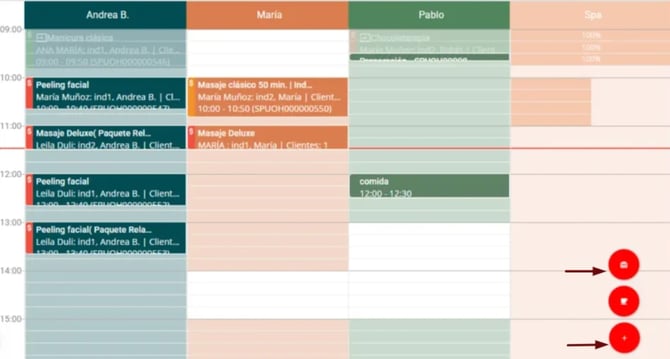
1. Access the Agenda
- Go to Agenda from the side menu.
- You can view the Agenda by day, employee, resource, or week, depending on your needs.
🔍 How it works: The Agenda view can be adapted to your daily operations from the configuration settings.
✉️Write to soporte@spalopia.com to book a free demo session.
2. Add a new appointment
- To add a treatment booking, click the “+” button located in the lower-right corner.
👉 How to create treatments in the back office? - To add a package booking, hover over the “+” button and select the top option (gift icon).
👉 How to create and configure a package?
3. Complete the booking details
- Customer name
Search for the customer by name, email address, or phone number in the CRM.
If the customer does not exist, you can create a new profile using the corresponding icon.
📌 Note: Whenever possible, always register the customer’s email address, as all notifications are sent by email.
🔍 How it works: If you work with a PMS integration, you can also search for in-house guests following the patterns defined during the setup process.
👉 PMS integrations for spas and wellness centres in hotels
- Date, service, and time
Indicate when and which service the customer will enjoy. - Rate
If special rates have been previously configured, you can select them here.
👉 How to configure rates and/or extras for a service? - Customer
You can specify who will attend the appointment, even if it is not the same person as the booking holder. - Seller comment (per appointment)
Internal note visible only to the centre’s staff. - Employee
Select who will perform the service.
👉 How to create and configure an employee? - Resource
Select where the service will take place.
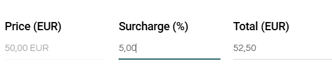
👉 How to create and configure a resource? - Discount or surcharge % (per appointment)
- For a discount, enter the percentage with a minus sign in front (for example: –5).

- For a surcharge, enter only the number (for example: 5).
- For a discount, enter the percentage with a minus sign in front (for example: –5).
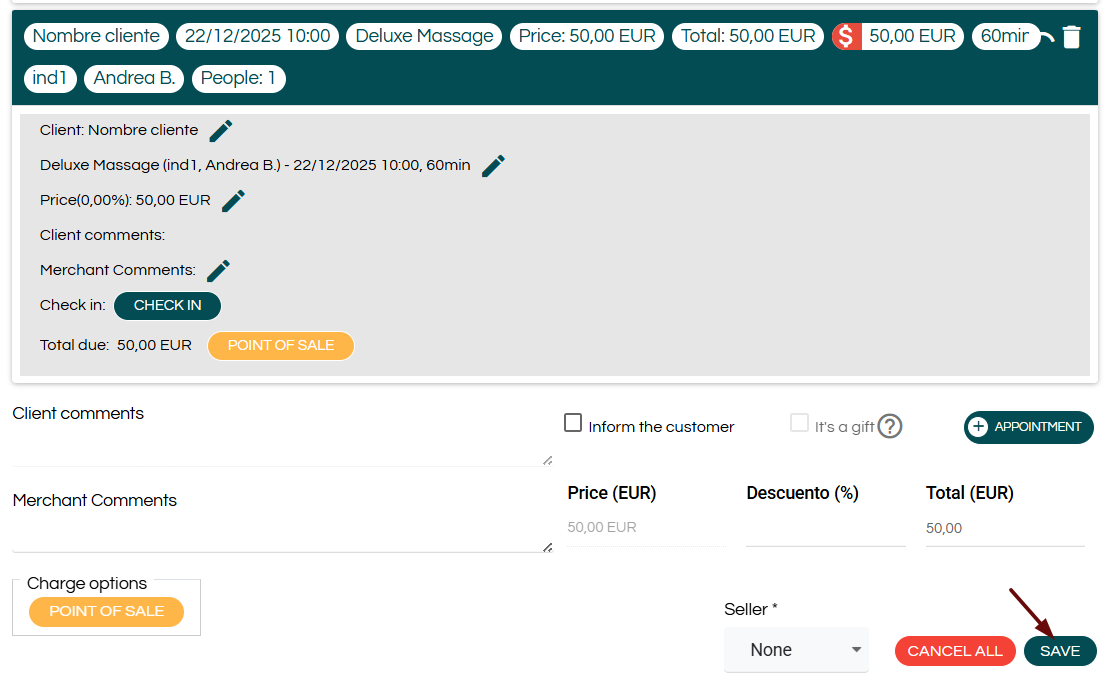
4. Other options before saving
- Seller comment (per booking)
General internal note that applies to the entire booking reference. - Notify customer
If enabled, the customer will receive a confirmation email at the address saved in their profile. - Request confirmation
Enable this option if you want to request a full or partial payment as a booking guarantee.
📌 Note: This option can only be activated before saving the appointment.
👉 How to request payment confirmation from the Agenda? - It is a gift
If the customer does not want the price to appear in the confirmation, enable this option together with Notify customer. - Discount or surcharge % (entire booking)
Works the same way as the individual field, but applied to the total booking. - + Appointment
This button allows you to add more appointments within the same booking.
5. Select the booking seller
Define the seller associated with the booking.
👉 How to create sellers?
👉 Booking sales commission
6. Always remember to SAVE the changes before leaving.
🔍 How it works: By default, appointments created from the Agenda are saved as payment pending (red side bar).
You can change their payment status from:
👉 How to manage the payment status of a booking? | Module: Agenda
👉 How to charge a booking? | Module: Point of Sale
📩 If you have any questions during the process, please write to soporte@spalopia.com